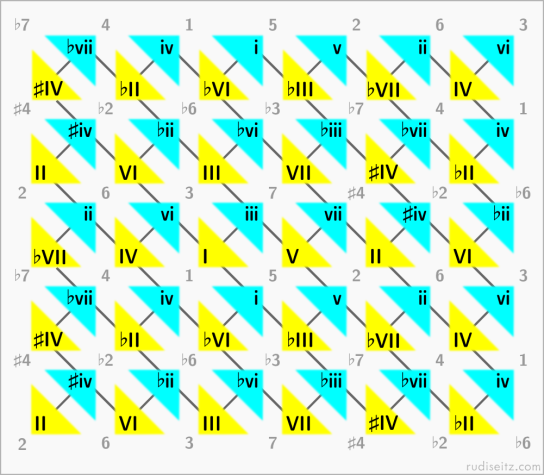
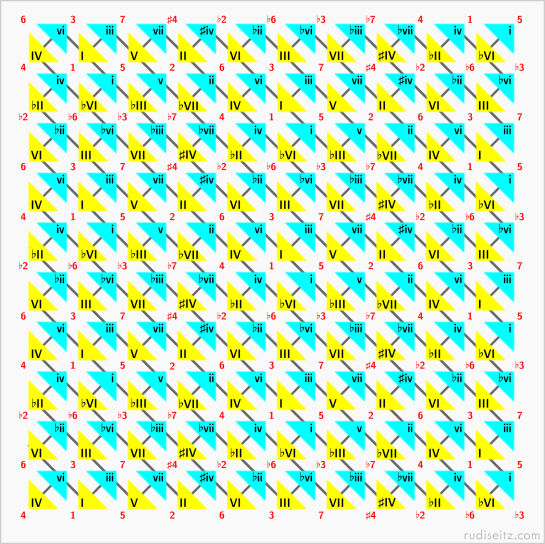
The Tonnetz is a graphical depiction of chord relationships that was developed by 19th-century music theorists building on work by the mathematician Leonhard Euler. If you pick any major or minor triad, you can use the Tonnetz to quickly find all of the triads that share one or two of its tones. If you’re building a chord progression, you can use the Tonnetz to find extended sequences of chords that are connected by common tones.
When I first came across the Tonnetz I found it amazingly elegant but also a bit mysterious: “Yeah, it works,” I thought, “But how on earth did anyone come up with this?” In this post I’d like to share a step-by-step process for building a Tonnetz. This is a process that I devised in my own study and I hope it will help the reader gain insight into how the Tonnetz works. To be clear, this is not necessarily the fastest way to construct the diagram, and I’m neither claiming that this approach is original nor that it matches the process that was used historically.
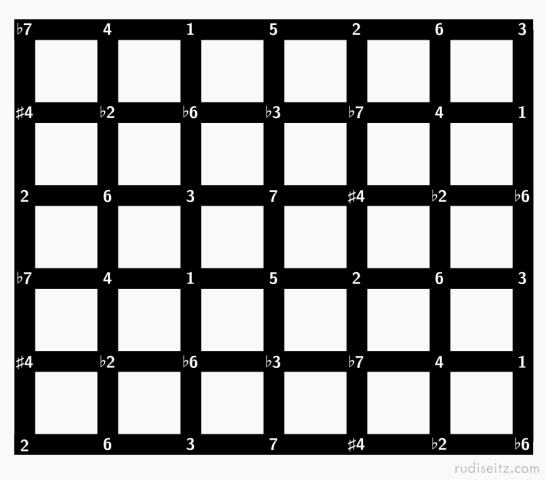
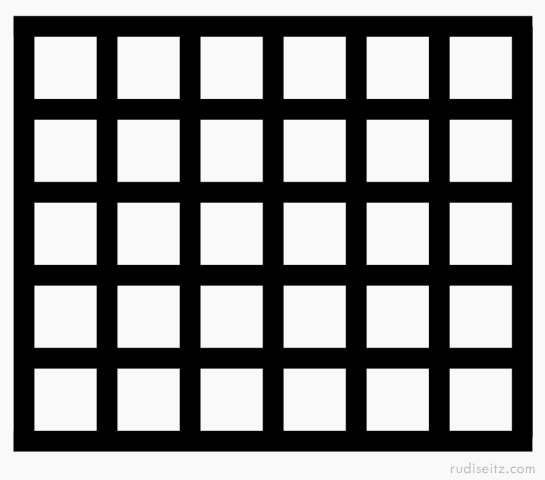
Step 1. We’ll start by drawing a simple grid:
 Step 2. Next we’ll turn our grid into a representation of musical space by placing a note at each grid intersection point. If we were building a so-called just-intonation lattice, we would represent notes by their precise frequency ratios, but here we are going to use scale degrees from an equal-tempered octave: 1, ♭2, 2, ♭3, 3, 4, ♯4, 5, ♭6, 6, ♭7, 7. We’ll lay the notes out so that stepping right in the grid corresponds to ascending by a perfect fifth and stepping up corresponds to ascending by a major third. So, if we put 1 at an arbitrary intersection, we must put 5 to its right, and 3 above it. Now let’s look at 5 – what should its neighbors be? Following the rules, we must put 2 to its right and 7 above it. Continuing like this we fill up the whole grid. Each horizontal line (reading from left to right) is a sequence of ascending fifths and each vertical line (reading from bottom to top) is a sequence of ascending major thirds:
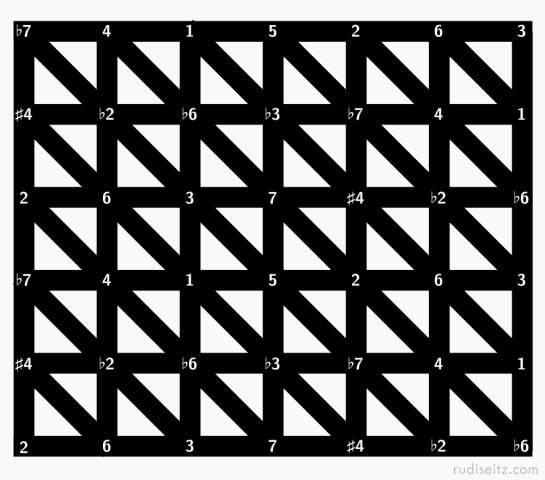
Step 3. Next we’ll add diagonal lines to our grid. These lines represent the minor third / major sixth relationship. Starting at 1, for example, and taking a diagonal hop down and to the right, we end up at ♭3, a minor third higher in musical space. Going in the other direction graphically (up and to the left) we land at 6, a minor third lower or a major sixth higher in musical space:
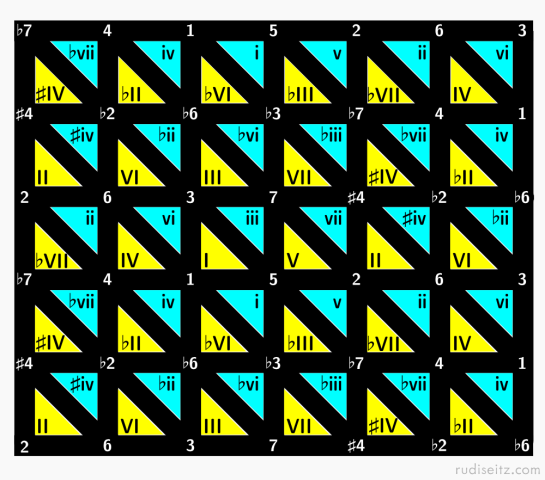
Step 4. Notice that each of the triangles formed by adding the diagonals is in fact a triad in the musical sense. Take a look at 1, for example: above it we have 3 and to its right we have 5. All three points are now connected by an edge – together, these edges form a right triangle that we can take to represent the major triad rooted at 1. We can also find an upside-down right triangle in the points 1, ♭3, 5, representing the minor triad rooted at 1. Let’s label all the chord-triangles in the diagram using Roman numeral notation: the 1, 3, 5 triangle gets the label I and the 1, ♭3, 5 triangle gets the label i:
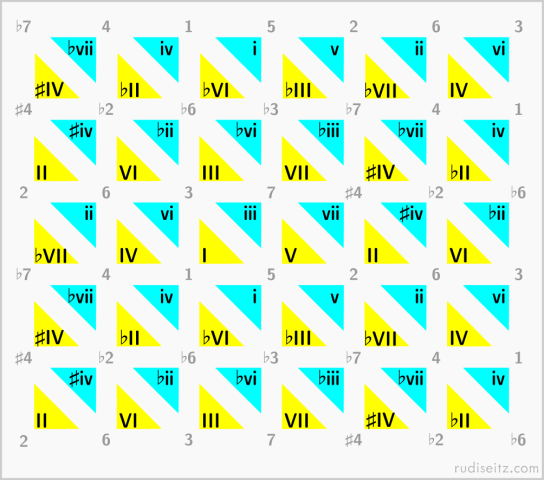
Step 5. Notice that if two triangles share an edge, the corresponding chords have two tones in common. If two triangles share a single point (i.e. they meet at a single intersection in the grid), the corresponding chords have one tone in common. In preparation to make these relationships more explicit, we’ll remove the black grid lines, leaving only the chord-triangles in place:
Step 6. Finally we’ll draw new lines connecting all of the chords that have two common tones. This will create a background pattern of rectangular tiles. We can see that any six triangles that share a rectangle represent six chords that share a common tone – the tone written in the center of the rectangle. The diagram can be prettified by stretching the rectangular tiles into hexagonal ones, but we’ll leave that for next time.
Here’s a bigger version:
